Are there environmental considerations associated with the use of these machines?

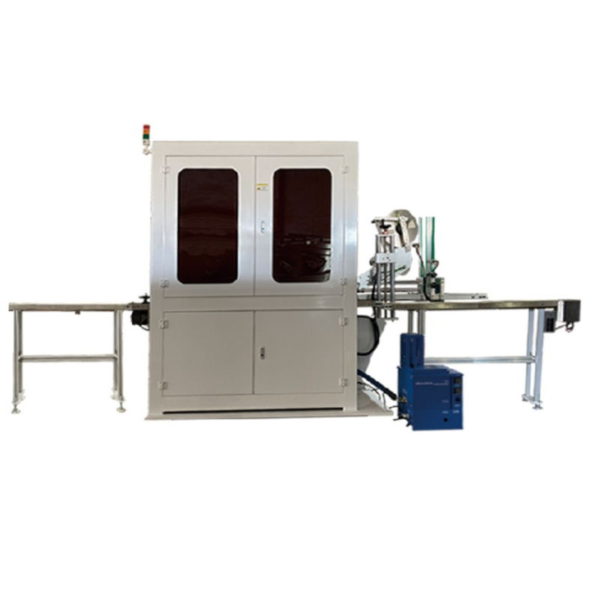
Yes, environmental considerations are relevant when using hot melt gluer machines:

  1. Adhesive Material: Some hot melt adhesives contain chemicals that can have environmental implications. Companies are increasingly opting for eco-friendly adhesive formulations that have reduced VOCs (volatile organic compounds) or are solvent-free to minimize environmental impact.
  2. Waste Management: Proper disposal of unused or excess adhesive materials is essential. Companies implement waste management strategies to minimize the environmental footprint of leftover adhesives, ensuring they are disposed of or recycled responsibly.
  3. Energy Consumption: Hot melt gluer machines require energy for heating the adhesive to the required temperature. Optimizing energy efficiency in these machines helps reduce overall energy consumption and associated environmental impacts.
  4. Cooling Systems: Some machines use cooling systems to solidify the adhesive after application. Efficient cooling systems or methods help in reducing energy usage and environmental impact.
  5. Emissions and Air Quality: In the application process, especially in large-scale operations, emissions from heating adhesives can impact indoor air quality. Companies implement measures such as proper ventilation or filtration systems to mitigate these effects.
  6. Packaging and Materials: The type of packaging used for adhesives, as well as the materials involved in manufacturing these machines, can have environmental implications. Some manufacturers prioritize using recycled or sustainable materials in both packaging and machine construction.
  7. Lifecycle Assessment: Assessing the overall environmental impact of hot melt gluer machines, from manufacturing to disposal, allows companies to identify areas for improvement and implement more environmentally friendly practices throughout the lifecycle of the machines.

Efforts to reduce the environmental impact associated with hot melt gluer machines involve adopting cleaner adhesive formulations, optimizing energy efficiency, hot melt gluer machine  managing waste responsibly, and considering the environmental impact throughout the entire lifecycle of the equipment and materials used.


How do these machines contribute to the overall production cost of gluing applications?

Hot melt gluer machines can impact the overall production cost of gluing applications in several ways:

  1. Equipment Cost: The initial investment in purchasing hot melt gluer machines contributes to the production cost. Different machine types, sizes, and capabilities can vary significantly in cost.
  2. Operational Efficiency: Efficient and well-maintained machines reduce downtime, increase output, and minimize material wastage. Higher efficiency contributes positively to reducing the overall production cost.
  3. Energy Consumption: Energy costs associated with running these machines, particularly for heating adhesives, contribute to operational expenses. Optimizing energy usage through efficient equipment designs can help manage these costs.
  4. Material Costs: The type and quality of adhesive materials used in the machines affect the overall production cost. Some specialized adhesives might be more expensive but offer specific benefits that impact the final cost.
  5. Maintenance and Repairs: Regular maintenance and occasional repairs are essential for the smooth operation of these machines. Maintenance costs contribute to the overall expenses but can prevent costly breakdowns and downtime.
  6. Labor Costs: Skilled operators are required to run and maintain these machines, impacting labor costs. Efficient machines might require fewer operators or less training time, reducing labor expenses.
  7. Waste Management: Proper management of unused or excess adhesive materials influences production costs. Minimizing waste through efficient application methods and recycling or disposal processes affects overall expenses.
  8. Output and Throughput: Higher throughput and increased output of these machines can positively impact economies of scale, lowering the cost per unit produced.
  9. Quality and Rejects: Machines that consistently produce high-quality glued products can reduce rejects and rework, contributing to cost savings by minimizing material wastage.

The overall impact on production costs varies based on factors such as machine efficiency, material choices, maintenance practices, labor requirements, and the specific application needs. Investing in efficient machines, optimizing processes, and minimizing waste are essential strategies to manage and potentially reduce the overall production cost of gluing applications.


What is the role of undercarriage rollers in distributing the weight and load of heavy machinery?

Undercarriage rollers play a critical role in distributing the weight and load of heavy machinery, such as construction equipment and tracked vehicles.

Their primary functions in weight distribution are as follows:

  1. Support and Stability: Undercarriage rollers are strategically positioned along the length of the undercarriage of heavy machinery. They provide support to the tracks and, by extension, the entire vehicle. This support is essential for maintaining the stability and balance of the machine, especially on uneven or soft terrain.
  2. Weight Dispersal: The weight of heavy machinery is substantial, and it needs to be evenly distributed to prevent excessive ground pressure. The undercarriage rollers help disperse this weight across a larger contact area by supporting the weight of the machine on the tracks. This reduces the likelihood of the equipment sinking into soft ground or causing damage to paved surfaces.
  3. Reducing Ground Pressure: Heavy machinery often operates in sensitive or environmentally protected areas. Even weight distribution achieved through undercarriage rollers helps minimize the ground pressure exerted by the equipment, reducing soil compaction and environmental impact.
  4. Balancing Loads: Undercarriage rollers contribute to maintaining a balanced load distribution on the tracks. When the machine carries a load or operates on slopes, the rollers play a crucial role in evenly distributing the weight to prevent tipping or loss of stability.
  5. Track Tension Control: Some undercarriage rollers are designed to assist in maintaining proper track tension. The tension of the tracks affects the machine’s weight distribution and overall performance. Undercarriage rollers help in adjusting and maintaining the correct track tension to ensure optimal operation.
  6. Wear Reduction: By supporting the tracks, undercarriage rollers also help reduce wear and tear on the tracks themselves. This extends the life of the tracks and minimizes the need for frequent replacements.

In summary, undercarriage rollers are a fundamental component of heavy machinery undercarriages, and their role in distributing the weight and load is vital for maintaining stability, protecting the terrain, and ensuring safe and efficient operation. Proper maintenance and inspection of these rollers are crucial to ensure their continued effectiveness in weight distribution.


How do you inspect undercarriage rollers for wear and damage, and what are the signs of potential issues?

Inspecting undercarriage rollers for wear and damage is essential to ensure the proper functioning and longevity of heavy machinery.

Here are the steps for inspection and common signs of potential issues:

Inspection Steps:

  1. Visual Inspection:
    • Start by visually examining each undercarriage roller, including the outer surface and components. Look for any visible signs of wear, damage, or irregularities.
  2. Check for Loose Components:
    • Ensure that all bolts, nuts, and fasteners securing the undercarriage rollers are tight and not missing. Loose components can lead to problems.
  3. Look for Cracks and Breaks:
    • Inspect the rollers for any cracks or breaks in the metal or rubber components. Cracks can weaken the roller’s structural integrity.
  4. Examine Rubber Pads:
    • If the undercarriage rollers have rubber pads, check for excessive wear, tears, or missing sections. Worn-out rubber pads can reduce traction.
  5. Check for Flat Spots:
    • Assess the roller’s surface for flat spots or uneven wear. Flat spots can lead to an uneven ride and increased vibration.
  6. Inspect Bearings and Bushings:
    • Check the bearings and bushings for signs of wear, corrosion, or play. Excessive play or damage can affect roller performance.
  7. Listen for Unusual Noises:
    • While operating the machinery, listen for any unusual noises coming from the undercarriage rollers. Unusual sounds can be an indicator of problems.

Common Signs of Potential Issues:

  1. Excessive Wear: Undercarriage rollers with significant wear may have a smoother or uneven surface. The loss of material can reduce their effectiveness.
  2. Cracks or Breaks: Visible cracks, breaks, or deformities in the rollers are clear signs of damage that require immediate attention.
  3. Loose Fasteners: If you notice loose bolts or fasteners, it’s essential to tighten them to prevent further issues.
  4. Uneven Wear: Flat spots or uneven wear patterns on the roller’s surface can affect the machine’s stability and ride quality.
  5. Abnormal Noises: Unusual or loud noises, such as squeaking or grinding, while the machine is in operation may indicate problems with the undercarriage rollers.
  6. Reduced Traction: If the rubber pads on the undercarriage rollers are worn out or damaged, it can result in reduced traction and decreased overall performance.
  7. Misalignment: A machine with track misalignment issues, such as tracks not running straight, can be a sign of problems with the undercarriage rollers.
  8. Increased Vibration: Excessive vibration during operation may indicate problems with the rollers’ condition or alignment.

If you identify any of these signs or issues during your inspection, it’s crucial to address them promptly. Regular maintenance, including the replacement of damaged or worn undercarriage rollers, is essential to ensure the safety and efficiency of heavy machinery.


How do you diagnose and troubleshoot issues with mini excavator track rollers?

Diagnosing and troubleshooting issues with mini excavator track rollers is essential to ensure the machine’s smooth operation and prevent further damage.

Here’s a step-by-step guide on how to go about it:

  1. Visual Inspection:
    • Start by performing a thorough visual inspection of the track rollers and their surrounding components.
    • Look for any signs of damage, wear, or irregularities in the rollers, such as cracks, missing pieces, or loose bolts.
  2. Listen for Unusual Noises:
    • When the mini excavator is in operation, pay close attention to any unusual noises coming from the track rollers.
    • Unusual noises can indicate issues like loose or damaged components.
  3. Check for Uneven Wear:
    • Examine the condition of the rubber tracks and inspect for uneven wear patterns.
    • Uneven wear may be a sign of misalignment or damaged rollers.
  4. Check for Loose Bolts and Fasteners:
    • Inspect the bolts and fasteners that secure the track rollers to the undercarriage.
    • Ensure that they are properly tightened and not missing.
  5. Test for Track Alignment:
    • Check if the tracks are properly aligned with the rollers.
    • Misalignment can cause excessive wear and affect the machine’s stability.
  6. Measure Roller Play:
    • Gently push and pull the track rollers to check for any excessive play or movement.
    • Excessive play can indicate worn bearings or bushings.
  7. Inspect Seals and Lubrication:
    • Examine the seals around the track rollers for damage or leaks.
    • Ensure that the rollers are adequately lubricated to reduce friction and wear.
  8. Monitor Track Tension:
    • Verify that the track tension is within the manufacturer’s recommended specifications.
    • Overly tight or loose tracks can lead to roller issues.
  9. Review Operating Conditions:
    • Consider the operating conditions of the mini excavator, such as the type of terrain it has been used on.
    • Certain terrains or heavy use can accelerate wear and tear on the track rollers.
  10. Consult the Owner’s Manual:
    • Refer to the mini excavator’s owner’s manual for maintenance guidelines and troubleshooting tips specific to your machine.
  11. Seek Professional Help:
    • If you identify any issues that you cannot address yourself or if the problems are severe, it’s advisable to contact a qualified technician or the equipment manufacturer for further inspection and repair.

Remember that regular maintenance and timely troubleshooting can help extend the lifespan of your mini excavator’s track rollers and ensure safe and efficient operation.


What is the typical lifespan of mini excavator track rollers, and when should they be replaced?


The typical lifespan of mini excavator track rollers can vary based on several factors, including the quality of the rollers, the operating conditions, and the maintenance practices. Generally, you can expect the following guidelines:

  1. High-Quality Rollers: Mini excavator track rollers made from high-quality materials and proper manufacturing processes tend to have a longer lifespan. They can last anywhere from 1,000 to 2,000 hours or more of operation.
  2. Operating Conditions: The type of terrain and usage conditions can significantly affect the lifespan of track rollers. Rough and abrasive terrains, as well as heavy loads, can accelerate wear and reduce the lifespan.
  3. Maintenance: Regular maintenance and proper care of the track rollers are crucial for extending their lifespan. This includes lubrication, track tension adjustment, and routine inspections.
  4. Inspection: Track rollers should be inspected regularly for signs of wear, damage, or misalignment. Any visible damage or irregularities should be addressed promptly.
  5. Replacement Indicators: There are several signs that may indicate it’s time to replace mini excavator track rollers:
    • Excessive wear: If the rollers are visibly worn down or have flat spots.
    • Severe damage: Cracks, breaks, or missing components in the rollers.
    • Increased noise: Unusual or loud noises coming from the rollers during operation.
    • Misalignment issues: If the rollers cause the tracks to deviate or become misaligned.
    • Frequent breakdowns: If the rollers require frequent repairs, it may be more cost-effective to replace them.
  6. Manufacturer Recommendations: Refer to the manufacturer’s guidelines for specific recommendations on the replacement intervals and conditions for your mini excavator’s track rollers.

It’s essential to address track roller issues promptly to prevent further damage to your mini excavator and to ensure safe and efficient operation. Regular maintenance and inspections can help you identify problems early and extend the lifespan of the track rollers. When replacement is necessary, use high-quality replacement parts and follow the manufacturer’s recommendations for installation.


How do double offset butterfly valves compare to traditional butterfly valves in terms of performance and application?

Double offset butterfly valves and traditional butterfly valves differ significantly in terms of their design and performance characteristics, which, in turn, affects their applications.

Here’s a comparison of the two:

  1. Design and Offset:
    • Traditional Butterfly Valves: Traditional butterfly valves have a single offset design. This means that the center of the valve disc is positioned slightly off-center from the centerline of the pipe, allowing for a bubble-tight shut-off but limited performance in higher-pressure or high-temperature applications.
    • Double Offset Butterfly Valves: Double offset butterfly valves have two offsets. The first offset, known as the “double offset,” is the offset from the centerline of the pipe. The second offset is the rotation axis of the disc, which is positioned behind the plane of the sealing surface. This design provides a more effective seal and superior performance.
  2. Sealing Mechanism:
    • Traditional Butterfly Valves: Traditional butterfly valves typically use a soft or resilient seat for sealing. While they provide good sealing in low to moderate-pressure applications, they are not well-suited for high-performance applications.
    • Double Offset Butterfly Valves: Double offset butterfly valves often use a metal-to-metal or high-performance seat. This design enables them to achieve bubble-tight shutoff, even in high-pressure and high-temperature environments.
  3. Performance in High-Pressure and High-Temperature Applications:
    • Traditional Butterfly Valves: Traditional butterfly valves may struggle to maintain a seal in high-pressure or high-temperature applications, which limits their use in these scenarios.
    • Double Offset Butterfly Valves: Double offset butterfly valves are designed to perform exceptionally well in high-pressure and high-temperature applications. They are often used in industries like oil and gas, petrochemical, and power generation.
  4. Bi-Directional Sealing:
    • Traditional Butterfly Valves: Traditional butterfly valves typically provide unidirectional sealing, meaning they can seal effectively in one direction only.
    • Double Offset Butterfly Valves: Double offset butterfly valves offer bi-directional sealing capabilities, making them suitable for applications where flow can change direction.
  5. Control and Throttling:
    • Traditional Butterfly Valves: Traditional butterfly valves are often used for on-off or modulating service in applications where precise control is not required.
    • Double Offset Butterfly Valves: Double offset butterfly valves are suitable for both on-off and throttling services due to their improved sealing and control capabilities.

In summary, double offset butterfly valves outperform traditional butterfly valves in high-pressure, high-temperature, and critical applications that demand superior sealing and control. double offset high performance butterfly valve Traditional butterfly valves are more commonly used in low-pressure, low-temperature applications where cost is a primary consideration. The choice between the two types of valves depends on the specific requirements of the application.

How are these valves suitable for controlling and throttling flow in various applications?

Double offset butterfly valves are suitable for controlling and throttling flow in various applications due to their design features and capabilities. Here’s how they are well-suited for such tasks:

  1. Precise Flow Control: Double offset butterfly valves have improved sealing mechanisms, allowing for precise control of flow rates. They can be used to regulate the flow of liquids, gases, or slurries in a system, which is essential in processes that require accurate flow adjustments.
  2. Wide Range of Flow Rates: These valves can handle a wide range of flow rates, from full open to nearly closed positions, making them versatile in applications where flow modulation is required.
  3. Bi-Directional Flow Control: Double offset butterfly valves can effectively control flow in both directions, allowing for bidirectional operation. This is important in systems where the flow can change direction, and the valve must maintain effective control regardless of the flow direction.
  4. High-Pressure Applications: Due to their design and materials, double offset butterfly valves are capable of withstanding high-pressure conditions. They are commonly used in applications such as power generation, oil and gas, and petrochemical industries where precise control of high-pressure fluids or gases is crucial.
  5. High-Temperature Applications: Double offset butterfly valves are designed to handle elevated temperatures, making them suitable for applications in industries where hot or thermal fluids are involved.
  6. Bubble-Tight Shut-off: The improved sealing mechanisms and double offset design ensure bubble-tight shut-off. This is essential in applications where preventing leakage or system contamination is critical.
  7. Reduced Pressure Drop: Double offset butterfly valves have a streamlined design, which helps reduce pressure drop across the valve. This can lead to energy savings and increased efficiency in fluid systems.
  8. Low Maintenance: These valves are known for their low maintenance requirements, which is advantageous in applications where reliability is crucial.
  9. Versatility: Double offset butterfly valves can be used in a wide range of industries, including water and wastewater, chemical processing, HVAC, and more. Their versatility in controlling flow makes them a popular choice.
  10. Cost-Effective Solutions: These valves often offer a cost-effective alternative to other types of control valves, such as globe valves or ball valves, while still providing precise flow control.

In summary, double offset butterfly valves are well-suited for controlling and throttling flow in various applications due to their precision, bidirectional sealing, pressure and temperature capabilities, low maintenance requirements, and cost-effectiveness. Their suitability depends on the specific requirements of the system and the nature of the fluids or gases being controlled.


What materials are commonly used in the construction of these gate valves?

DIN 3202 F4 and F5 gate valves are typically constructed using a variety of materials to suit different applications and environmental conditions. The choice of materials depends on factors such as the type of fluid being handled, pressure requirements, temperature, and corrosion resistance.

Common materials used in the construction of these gate valves include:

  1. Cast Iron: Cast iron gate valves are a popular choice for general industrial applications. They are durable and cost-effective.
  2. Ductile Iron: Ductile iron gate valves are known for their strength and durability, making them suitable for high-pressure and high-temperature applications.
  3. Carbon Steel: Carbon steel gate valves are commonly used in applications where resistance to high pressure and temperature is required. They are also used in applications involving non-corrosive fluids.
  4. Stainless Steel: Stainless steel gate valves are used when corrosion resistance is a priority, particularly in industries dealing with corrosive or chemical fluids.
  5. Bronze: Bronze gate valves are often used for marine and seawater applications due to their excellent corrosion resistance properties.
  6. Brass: Brass gate valves are used for water and air applications and offer good corrosion resistance and ease of maintenance.
  7. Alloy Steel: Alloy steel gate valves are chosen for applications requiring high strength and resistance to high temperatures and pressures.
  8. Forged Steel: Forged steel gate valves are used in high-pressure and high-temperature applications and are known for their strength and reliability.
  9. Nickel-Alloy: Nickel-alloy gate valves are selected for extremely corrosive environments, such as in the chemical and petrochemical industries.

The specific material chosen for a DIN 3202 F4 or F5 gate valve will depend on the intended use and the properties required to ensure the valve’s performance and longevity in that particular application. din3202f4&f5 gate valve  It’s important to consult the manufacturer’s specifications and guidelines to select the appropriate material for a given application.


How does the pressure rating of DIN 3202 F4 and F5 gate valves differ?

The pressure ratings of DIN 3202 F4 and F5 gate valves differ based on their design and construction. These pressure ratings indicate the maximum allowable pressure at which the valves can safely operate. Here’s how the pressure ratings of DIN 3202 F4 and F5 gate valves typically differ:

  1. DIN 3202 F4 Gate Valve:
    • DIN 3202 F4 gate valves are designed for lower-pressure applications.
    • They are typically suitable for operating pressures up to PN16 (16 bar or approximately 232 psi).
    • F4 gate valves are commonly used in applications where lower to moderate pressure handling is required.
  2. DIN 3202 F5 Gate Valve:
    • DIN 3202 F5 gate valves are designed to handle higher pressure conditions.
    • They typically have higher pressure ratings, such as PN25 (25 bar or approximately 363 psi) or even higher, depending on the specific design and manufacturer.
    • F5 gate valves are used in applications where higher pressure requirements are necessary.

It’s important to note that the actual pressure rating of a gate valve can vary based on factors such as the materials used, the design and manufacturing standards, and the specific manufacturer’s specifications. Therefore, it’s crucial to consult the manufacturer’s documentation and product data sheets to determine the precise pressure rating of a DIN 3202 F4 or F5 gate valve for a particular application. Choosing the right pressure rating is essential to ensure the safe and efficient operation of the valve in a given system.

What steps should be taken to protect a wrought iron door after cleaning?

After cleaning a wrought iron door, it’s important to take steps to protect it and maintain its appearance.

Here are some recommended steps to protect a wrought iron door:

Dry the Door: Ensure that the wrought iron door is thoroughly dried after cleaning. Moisture left on the surface can lead to rust or corrosion over time. Use towels or allow sufficient air drying time before applying any protective measures.

Apply a Protective Coating: Consider applying a protective coating or sealant to the cleaned wrought iron door. This can help prevent moisture penetration, inhibit rust formation, and provide a barrier against environmental elements. There are various types of protective coatings available, including clear polyurethane, rust-inhibiting paints, or specialized metal sealants. Follow the manufacturer’s instructions for application.

Touch up the Paint: If the wrought iron door is painted, check for any signs of chipping or peeling paint after cleaning. Touch up these areas with matching paint to protect the underlying metal from exposure and potential rusting. Ensure that the paint used is suitable for exterior use and provides adequate protection against the elements.

Apply Wax or Polish: Consider applying a wax or metal polish specifically formulated for wrought iron. These products can add an extra layer of protection, enhance the door’s shine, and make it easier to clean in the future. Follow the product instructions for application and buff the surface for a smooth finish.

Regular Maintenance: Establish a regular maintenance routine for the wrought iron door. Regularly inspect the door for signs of damage, rust, or deterioration. Clean the door as needed to remove dirt or grime. Promptly address any issues or areas requiring touch-ups to prevent further damage.

Avoid Harsh Chemicals or Abrasives: When cleaning or maintaining a wrought iron door, avoid using harsh chemicals, abrasive cleaners, or rough brushes. These can damage the surface, strip protective coatings, or scratch the metal. Opt for gentle cleaning agents and soft cloths or non-abrasive sponges for routine maintenance.

Keep the Surrounding Area Clean: Ensure that the area around the wrought iron door is kept clean and free from debris. Leaves, dirt, or other organic matter can accumulate and trap moisture against the door, leading to potential rust or corrosion. Regularly sweep or clean the surrounding area to maintain a clean environment.

By following these steps, you can help protect your wrought iron door and prolong its lifespan while preserving its aesthetic appeal.

What are some effective techniques for removing rust from a wrought iron door?

Removing rust from a wrought iron door requires specific techniques to effectively restore its appearance. Here are some effective techniques for rust removal from a wrought iron door:

Wire Brush or Steel Wool: Start by using a wire brush or steel wool to scrub the rusted areas. These tools can help loosen and remove surface rust. Ensure to use gentle pressure to avoid scratching or damaging the wrought iron surface.

Sanding: For more stubborn rust or areas with thicker rust buildup, sanding can be effective. Use sandpaper with a medium to fine grit to gently sand away the rust. This process helps smooth the surface and prepares it for further treatment.

Chemical Rust Removers: There are commercial rust removers available that can be applied to the affected areas. Follow the instructions provided with the product for application and safety guidelines. These rust removers typically contain chemicals that dissolve or convert rust, making it easier to remove.

Vinegar or Lemon Juice: Natural acids like vinegar or lemon juice can be used as homemade rust removal solutions. Soak a cloth or paper towel in vinegar or lemon juice and apply it to the rusted areas. Let it sit for some time to allow the acid to work on the rust. china wrought iron door cleaner supplier  Then, scrub the area with a brush or cloth to remove the loosened rust.

Baking Soda Paste: Create a paste by mixing baking soda with water until it forms a thick consistency. Apply the paste to the rusted areas and let it sit for a while. Scrub the paste using a brush or cloth to remove the rust. Baking soda acts as a gentle abrasive and can help remove surface rust.

Rust Converters: Rust converters are chemical solutions designed to convert rust into a stable compound that can be painted over. Apply the rust converter to the affected areas according to the product instructions. As the rust converter reacts with the rust, it forms a protective coating that can be painted over.

Repainting: After removing the rust, consider repainting the wrought iron door to provide a fresh protective layer. Clean the surface thoroughly, apply a suitable primer, and follow it with a paint specifically formulated for metal surfaces. This helps prevent future rust formation and enhances the door’s appearance.

It’s important to note that rust removal techniques may vary depending on the severity of the rust and the specific condition of the wrought iron door. Always wear protective gloves and follow safety guidelines when working with rust removal products or chemicals.

What materials can be engraved using a 50-watt fiber laser engraver?

A 50-watt fiber laser engraver is capable of engraving a wide range of materials.

Here are some common materials that can be engraved using a 50-watt fiber laser engraver:

Metals: A 50-watt fiber laser engraver can engrave various metals, including stainless steel, aluminum, brass, copper, titanium, and more. It can create high-contrast markings, deep engravings, or surface etchings depending on the specific metal and laser settings.

Plastics: Many types of plastics can be engraved with a 50-watt fiber laser engraver. This includes acrylic, ABS, polycarbonate, PVC, PET, and more. It can produce precise, detailed engravings on plastic surfaces.

Wood: Different types of wood, such as plywood, hardwood, MDF, or veneers, can be engraved using a 50-watt fiber laser engraver. It can create intricate designs, patterns, or text on wood surfaces.

Leather: Leather products like wallets, belts, shoes, or book covers can be engraved with a 50-watt fiber laser engraver. It can leave a burned or etched effect on the leather surface, allowing for personalized designs or text.

Glass: While not as common as with other materials, some 50-watt fiber laser engravers can perform surface etching or marking on glass. This can be used for creating personalized glassware, awards, or decorative glass pieces.

Stone: Certain types of stone, such as slate, marble, or granite, can be engraved using a 50-watt fiber laser engraver. It can create detailed designs or text on stone surfaces, producing a contrasting effect or depth in the engraving.

Ceramic: Similar to glass, some 50-watt fiber laser engravers can mark or engrave ceramic materials. This can be used for adding personalized designs or branding to ceramic items.

Coated Metals: A 50-watt fiber laser engraver can engrave coated metals, such as anodized aluminum, powder-coated steel, or painted surfaces. It can remove the coating to reveal the underlying metal, creating high-contrast engravings.

It’s important to note that the suitability of a material for laser engraving can depend on factors such as its composition, 50 watt fiber laser engraver  thickness, and any surface treatments or coatings. It’s advisable to perform tests or consult the manufacturer’s recommendations to ensure compatibility and achieve desirable engraving results.

What is the maximum engraving depth achievable with a 50-watt fiber laser engraver?

The maximum engraving depth achievable with a 50-watt fiber laser engraver can vary depending on several factors, including the material being engraved, the focus setting of the laser, and the specific machine’s capabilities. Generally, a 50-watt fiber laser engraver can achieve engraving depths ranging from a few micrometers to a few millimeters.

For materials like metals, the engraving depth is typically shallow, ranging from micrometers to a few tenths of a millimeter. This is because metals have high thermal conductivity, and the laser energy is quickly dissipated, resulting in limited penetration.

On the other hand, softer materials like wood, plastics, or leather can be engraved deeper with a 50-watt fiber laser engraver. Depending on the specific material and laser settings, engraving depths of several millimeters can be achieved.

It’s important to note that achieving deeper engraving depths may require multiple passes or adjusting the laser parameters such as speed, power, and focus. However, pushing the limits of engraving depth can affect the quality of the engravings, such as increased roughness or reduced clarity.

To determine the optimal engraving depth for a specific material and design, it is recommended to perform test engravings and adjust the laser settings accordingly. Additionally, it’s important to consider the material’s characteristics, such as its hardness, density, and heat sensitivity, to achieve the desired engraving depth while maintaining the quality of the engraving.

The Key Role of a dielectric withstand tester in Application Quality Assurance

A dielectric withstand tester, also known as a high-potential (hipot) tester, plays a key role in application quality assurance, particularly in industries involving electrical and electronic equipment. Here are the key roles of a dielectric withstand tester in ensuring application quality assurance:

Insulation Integrity Testing:

The primary role of a dielectric withstand tester is to assess the integrity of insulation systems in electrical equipment. It applies a high voltage to the equipment to test its ability to withstand the specified voltage without experiencing electrical breakdown. By subjecting the insulation to higher voltages than normal operating conditions, the tester detects any weaknesses, defects, or insulation breakdown points that could compromise the equipment’s functionality or safety.

Verification of Compliance:

Dielectric withstand testing helps verify compliance with industry standards, regulations, and safety requirements. Many industries have specific standards, such as IEC 61010 and UL 60950, which define the minimum dielectric strength or withstand voltage levels that electrical equipment must meet. By performing dielectric withstand tests, manufacturers can ensure that their products meet these standards, providing assurance to customers and regulatory bodies that the equipment is safe and reliable.

Early Detection of Insulation Issues:

Dielectric withstand testing is conducted during the manufacturing process as well as periodic maintenance to detect insulation issues at an early stage. By applying high voltage stress to the equipment, the tester can identify insulation weaknesses, such as improper assembly, degraded materials, or manufacturing defects. Early detection allows for timely corrective actions, reducing the likelihood of equipment failure, improving reliability, and enhancing overall application quality.

Prevention of Electrical Hazards:

Dielectric withstand testing helps prevent electrical hazards by identifying potential faults or weaknesses that could lead to electrical breakdowns, shocks, or fires. By subjecting the equipment to voltages higher than its normal operating levels, the tester ensures that the insulation can withstand abnormal conditions and avoid dangerous situations. This testing is particularly important in applications with high voltages, such as power distribution systems or medical equipment, where electrical safety is critical.

Quality Control and Assurance:

Dielectric withstand testing is an essential part of quality control processes for electrical equipment manufacturers. By performing stringent testing on finished products, manufacturers can ensure that each unit meets the required dielectric strength and safety standards. This ensures consistent quality and reliability across the entire product line, enhancing customer satisfaction and maintaining a positive reputation in the market.

Preventive Maintenance:

Dielectric withstand testing is also performed as part of preventive maintenance programs for electrical equipment. Regular testing helps identify insulation degradation over time due to factors such as aging, environmental conditions, or mechanical stress. By monitoring the dielectric strength, maintenance personnel can schedule timely maintenance or replacement of insulation components, preventing unexpected failures, and extending the equipment’s lifespan.

What are some potential drawbacks or limitations of using cheap wet wipes?

While cheap wet wipes can be convenient and affordable, they may have some drawbacks or limitations.

Here are a few potential considerations:

Quality and Durability: Cheap wet wipes may be made with lower-quality materials, which can affect their durability and performance. They may tear easily or not hold up well during use, potentially leading to a less effective cleaning experience.

Moisture Content: Cheap wet wipes may have inconsistent moisture levels. Some wipes might be too dry, while others may be overly saturated. This inconsistency can impact their ability to effectively clean or moisturize.

Harsh Ingredients: In order to keep costs low, cheap wet wipes may contain harsh ingredients or chemicals that can be irritating to the skin. These wipes may lack the gentler formulations found in higher-quality options, which could lead to discomfort or adverse reactions, particularly for individuals with sensitive skin.

Fragrance or Scent: Some cheap wet wipes may have a strong or artificial fragrance. This can be undesirable for those sensitive to scents or prefer unscented products.

Limited Applications: Cheap wet wipes may be designed for specific uses and may not be as versatile as higher-quality alternatives. For example, they may be less effective at removing stubborn stains or have limited disinfecting properties.

Environmental Impact: Cheaper wet wipes may not be as environmentally friendly as more expensive options. They may be made from non-biodegradable materials or contain excessive packaging that contributes to waste.

Resealability: Cheap wet wipes may have inferior resealable packaging, leading to drying out of the wipes over time. This can reduce their shelf life and effectiveness.

Skin Sensitivity: Due to the potential use of lower-quality materials and harsh ingredients, some individuals with sensitive skin may experience irritation or allergic reactions when using cheap wet wipes.

It’s important to note that not all cheap wet wipes will have these limitations, and some brands may offer affordable options that still provide satisfactory performance. When choosing wet wipes, it’s advisable to read reviews, check ingredient lists, and consider personal preferences and needs to make an informed decision.

How long can cheap wet wipes be stored before they expire?

The storage and expiration time of cheap wet wipes can vary depending on several factors, including the specific brand, formulation, and packaging. It’s best to refer to the manufacturer’s instructions or packaging for accurate information regarding the expiration date or shelf life of the specific cheap wet wipes you are using.

Generally, most wet wipes, including cheaper ones, cheap wet wipes   have a shelf life ranging from one to three years from the date of manufacture. However, it’s important to note that once the package is opened or the seal is broken, the wet wipes may begin to dry out over time, reducing their effectiveness.

To maximize the shelf life of cheap wet wipes, it’s recommended to store them in a cool, dry place away from direct sunlight and extreme temperatures. Proper storage conditions can help preserve the moisture and quality of the wipes for a longer period.

If you’re unsure about the expiration date or the condition of the cheap wet wipes, it’s advisable to discard them and replace them with a fresh package to ensure their effectiveness and hygiene.


How can fire-resistant paper contribute to fire safety measures in buildings or structures?

Fire-resistant paper can contribute to fire safety measures in buildings or structures in several ways.

Here are some ways in which fire-resistant paper can be beneficial:

Flame Retardancy: Fire-resistant paper is designed to resist or delay the ignition and spread of flames. When used in areas where fire hazards exist, such as electrical panels or circuits, fire-resistant paper can help prevent the rapid spread of fire and minimize the risk of fire-related accidents.

Heat Insulation: Fire-resistant paper often has good heat insulation properties. It can help protect surrounding materials and structures by reducing heat transfer during a fire. This can be particularly useful in applications where there is a need to protect sensitive equipment or critical infrastructure.

Smoke Reduction: Fire-resistant paper can help reduce the amount of smoke generated during a fire. Smoke inhalation is a significant health hazard during a fire, and by using fire-resistant paper, the generation and spread of smoke can be minimized, improving visibility and facilitating safe evacuation.

Structural Integrity: Fire-resistant paper can help maintain the structural integrity of certain building components in the event of a fire. It can provide a protective layer, preventing structural members or materials from reaching critical temperatures that could compromise their strength and stability.

Code Compliance: Fire-resistant paper can fulfill the fire safety requirements and codes mandated by building regulations. Using fire-resistant paper in specific applications can help meet the necessary fire protection standards and ensure compliance with local fire safety regulations.

Emergency Response: Fire-resistant paper can assist emergency responders by slowing down the progression of a fire. By providing additional time for evacuation and firefighting efforts, fire-resistant paper can enhance the overall effectiveness of emergency response procedures.

Documentation Protection: Fire-resistant paper can be used to safeguard essential documents, records, or plans. By using fire-resistant paper for archival storage or document protection, vital information can be preserved in the event of a fire, minimizing the risk of data loss or damage.

It’s important to note that the specific benefits and effectiveness of fire-resistant paper may vary depending on the product’s specifications, fire resistant paper  the application, and the overall fire safety measures implemented in a building or structure. Consulting with fire safety professionals or experts can provide more tailored guidance and recommendations for incorporating fire-resistant paper into specific fire protection strategies.

How is fire resistance achieved in paper?

Fire resistance in paper is achieved through various methods and treatments that enhance its ability to withstand or resist ignition, combustion, and the spread of flames.

Here are some common techniques used to achieve fire resistance in paper:

Chemical Treatments: Fire-resistant paper may undergo chemical treatments that involve the application of flame retardant substances. These substances can be sprayed or coated onto the paper fibers or incorporated during the papermaking process. Flame retardants work by interrupting the combustion process, either by releasing flame-inhibiting gases, forming a protective char layer, or diluting the combustible gases.

Intumescent Coatings: Intumescent coatings are applied to the surface of paper to provide fire resistance. These coatings contain special additives that react when exposed to heat, swelling and forming a protective insulating layer. This layer acts as a barrier, reducing heat transfer and delaying the spread of flames.

Fiber Blending: Fire-resistant paper can be produced by blending fibers with inherently fire-resistant properties, such as mineral fibers or specialty fibers like aramid or glass fibers. These fibers have high resistance to heat and combustion, which enhances the overall fire resistance of the paper.

Laminating or Impregnating: Fire resistance can be achieved by laminating or impregnating paper with fire-resistant materials. This involves bonding or saturating the paper with fire-resistant substances, such as fire-resistant films or coatings. The added layer provides additional protection and enhances the paper’s fire resistance.

Mechanical Treatments: Mechanical treatments, such as embossing or creping, can be applied to the paper to increase its surface area and improve its resistance to flames. These treatments modify the paper’s structure, making it more difficult for flames to ignite and spread.

High-density Paper Production: Fire-resistant paper can be manufactured with higher paper density. By increasing the density, the paper becomes more compact, reducing the availability of oxygen necessary for combustion and making it less prone to ignition.

It’s important to note that the specific methods used to achieve fire resistance in paper can vary depending on the desired level of fire resistance, intended applications, and industry standards. Different combinations of treatments and techniques may be employed to meet specific fire safety requirements. Additionally, the effectiveness and durability of fire-resistant paper can depend on factors such as the quality of materials used, proper installation, and adherence to maintenance guidelines.